Last year, I was giving a little treat to my class at the Halloween Midterm.
I bought some lollipops, wrapped a tissue around it and secured it with an elastic band.
Then I drew on two eyes and a mouth.
It was a very simple idea but the children liked them!
Wednesday, 25 October 2017
Tuesday, 24 October 2017
Books Worth a Look #3 'The City of Ember'

This is the third post in Books Worth a Look. (I have purchased these books myself and do not receive sponsorship/freebies for reviewing them!)
Next up is 'The City of Ember' by Jeanne DuPrau. It has been made into a movie aswell so it could be a good one to read with the children and then compare and contrast the film.
I had never come across this book before until the summer when I ordered it online. I feel it is most suitable for the senior end of the school. (It is important to note that the main character has lost her parents and also loses her grandmother during the story).
Theme/Overview
The book is set in the fictional city of Ember which has been built to be self sufficient from any outside world. However, the city is now running out of supplies and the generator is having more and more failures as the city is plunged into darkness repeatedly. People are becoming more anxious about the future. The main characters need to try and find an escape route to see what lies beyond the city boundaries.
Activities
- Science: explore Electricity and how it works
Check out http://www.primaryscience.ie/ for experiments based on Electricity.
This link has some videos that are worth a look.
http://www.primaryscience.ie/activities_activity_movies.php
Discuss ways to conserve electricity and different ways to generate electricity.
Explore the different sources of light, both natural and artificial.
- Art: create city scapes of buildings.
I really like these ones make using newspaper.
 |
| Image Source |
- Visualisation: This book would be good to challenge children to visualise it in their heads and illustrate it. They could contrast 'the City of Ember' and the land they arrive in.
- Get creative and plan their own city (Maths and Art). In groups they could construct a city using a variety of materials
- Pack your bags! Discuss what treasured belongings you would bring if you had to move to a new home.
Check out the other Books Worth a Look posts:
Monday, 9 October 2017
Fun with the 5 Senses
This month in Science my class were learning about the five senses. Here are some of the activities we did based on the Senses, which I spread over a few lessons.
- Structure of the sense organs
 |
| Image source |
Experiments/Activities
Eye
Which is your dominant eye?Where is your blind spot?
Hearing
Identify the sound
Smell
What's that smell?Taste
Blind tasting with and without the sense of smellTouch
- Feely bag (make it trickier by putting a sock or glove on their hand or use different parts of the body to feel the object to show that our sense of touch is less sensitive on our arm than our finger tips etc. )
- Trace a message on an arm (and guess what they traced)
- Finger prints (chat about how each finger print is individual)
Find this experiment and more by clicking here.
Sense poetry
I gave a different setting to each child. They had to use the formation of a sense poem to describe the setting without mentioning it. The rest of the class had to guess the setting.
Examples: farmyard, seaside, woods, school, cinema, restaurant
- Discussion/appreciation of not having use of one of your senses
For example, we looked at how Braille is used for those who are visually impaired.
Thursday, 5 October 2017
Building Project
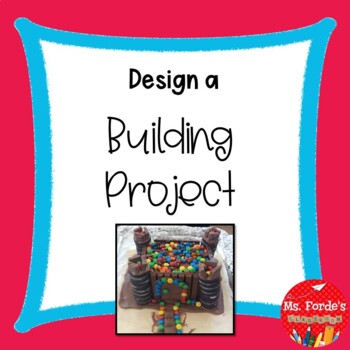
Following on from the students' enthusiasm and engagement with the 'Bridges Project' last year, we did a 'Building Project' this year.
I did it in a similar way to the bridge project. First of all, we looked at different types of buildings all around the world and how they have changed over the years.
Then we looked at the types of materials that are used and why (for example why we use blocks in Ireland compared to mud huts in Africa).
We also looked at famous buildings around the world to give the children some inspiration and ideas.
The children then had to complete their project booklet and construct a building of their own!

Take a look at a few of the finished projects.
The students presented them to the whole school after presenting them to the class.
Science: Materials (and how they can be used in construction)
Art: Construction
English: Oral Language, Procedural Writing
Geography: Homes Around the World
History: Change of Buildings over time (contrast photos of your locality: now versus long ago)
SPHE: Differences
I did it in a similar way to the bridge project. First of all, we looked at different types of buildings all around the world and how they have changed over the years.
Then we looked at the types of materials that are used and why (for example why we use blocks in Ireland compared to mud huts in Africa).
We also looked at famous buildings around the world to give the children some inspiration and ideas.
The children then had to complete their project booklet and construct a building of their own!

Take a look at a few of the finished projects.
The students presented them to the whole school after presenting them to the class.
Integration Ideas
Science: Materials (and how they can be used in construction)
Art: Construction
English: Oral Language, Procedural Writing
Geography: Homes Around the World
History: Change of Buildings over time (contrast photos of your locality: now versus long ago)
SPHE: Differences
Other Project Ideas:
Bridge Project
Monday, 2 October 2017
3D Hot Air Balloons
Last year, I did this art lesson with my class but this year when I decided to do it again I had forgotten how exactly I did it. So I am going to jot it down here for future reference!
Materials
- Various Coloured paper-A4
- Hot Air balloon template or blank page
- Scissors
- Pritt Stick
- Rulers
- Pencils
How to make them them
First off, I gave each child one coloured page. (Giving each child in a group a different colour will help to divide them out easily after)Placing it portrait in front of them, they marked 1.5cm intervals across the page using their ruler and pencils.
Then they cut their coloured page along the intervals, leaving them with strips 1.5cm in width.
The children can then share out the coloured paper so they have a mixture of coloured strips.
I gave my class a hot air balloon template but the children can also draw their own.
Fold about 2cm of the strip on each side. Put Pritt stick on the folded part. Place the part with Pritt stick on the edge of the hot air balloon and on the opposite side of the balloon.
Continue with the next strip until you have made you way around the balloon, placing one side north of the previous strip and one side South.
Decorate the hot air balloon with people, surrounding clouds etc.

Tips
Try to put strips right beside each other to avoid gaps.
Ensure children fold the edges of the strips inwards rather than outwards.
Ensure children fold the edges of the strips inwards rather than outwards.


