Showing posts with label Art. Show all posts

Sunday, 14 November 2021

Christmas Art Activities

 Here are a few Art ideas that I have used with my class over the past few years.

Foam Snowmen


They were great fun to make and the children loved decorating them. Read the step by step instructions here.

Sock Snowmen

These were probably my favourite Christmas activity to do. I have done these with a lot of classes over the years, and it is a nice one that they can keep year after year. 
  

You need:
  • white sock 
  • colourful sock (for hat & scarf)
  • buttons/pom poms for buttons
  • elastic band
  • Rice
  • googly eyes
  • Hot glue gun is very useful for this but you could also use PVA.

This video is worth watching as it shows step by step instructions.

3D Cribs

This is a great project for the week leading up to the Christmas holidays. Each student brought in a shoebox and we used templates from Monster Chest's TPT Store. You can paint the background or use coloured paper/tissue paper. 


Rudolph Baubles

This is a drawing and painting lesson with some construction of baubles too!

Firstly, we drew an outline of Rudolph from a template I drew on the board. Then we painted them, mixing different shades of brown. While they dried, we cut out 4 circles from different coloured paper. We folded each circle in half and glued one half of a circle to another, continuing until you had used 4 circles. This creates one bauble so repeat until you have 3 or 4 to hang from the antlers. You can also add a little glitter to Rudolph's nose. To finish, we backed them on red paper.


Clay Christmas Tree Decoration

Cookie cutters are really useful for this Art activity. Each student chose a shape they would like to make. They rolled out their clay and used the cookie cutters to create the shape. Some made little decorations for their Christmas Tree to give it more of a 3D effect. Using a straw, we put a hole in each decoration, so we could add a ribbon to hang it from the tree. Finally, we painted them!


Christmas Tree Scene (as seen on @artwithmslahart)

This is a lovely colourful art lesson. We drew lines lightly to outline the ground. We painted the sky and added some snowflakes.  While it dried, we used tissue paper to design our trees. We cut them out in triangular shapes and stuck them down.


Hopefully you might find an idea or two for this year. Feel free to add in your own favourites in the comments.


Wednesday, 19 May 2021

World Bee Day Art

Tomorrow is World Bee Day but this art lesson could be nice to do anytime during the summer term.  Here is a step by step of how to do it, which you can use with your class. You could also add flowers to make it even more colourful!


Use bubble wrap to create the background on a sheet of white paper. Alternatively, children could cut out hexagons to make the background. Leave to dry.


Draw an outline of a bee and colour it in. 

Add eyes, wings etc.

If you want to make it moveable, then add a lollipop stick to the bee.

When the background has dried, cut a wiggly line to make a pathway for the bee.

Slide the bee into the cut line.


Back the background onto a coloured page and you have some buzzy art!

Tag @msfordesclassroom on social media if you give it a go!

Tuesday, 1 December 2020

Foam Snowmen

This is a really fun Art lesson to do in the lead up to Christmas.  I got the idea from a colleague who had used shaving foam to make ice-cream cones in an Art lesson. The students loved the texture of the mixture, which feels like a marshmallow once it has dried.

What you need

  • Shaving foam
  • PVA glue
  • Coloured card
  • Big bowl
  • Spoons
  • Decorations (matchsticks, buttons, googly eyes, old socks as scarves, hats, nose)


How to make the foam

Add approximately 3 parts shaving foam to 1 part PVA glue to a bowl and stir.....that is it!

Draw a rough outline of 3 circles for the snowman on the card.

Using a big spoon and small spoon, add foam to the card (don't flatten it too much!)
Shape it roughly into circular shapes.

Add mini snowflakes/snowballs if you want.

Add your details to the snowman (nose, buttons etc.).
Allow to dry overnight and you have a really cute 3D foam snowman.


Tips

*Do a trail run first as different shaving foams can give different results. My first attempt looked great but didn't remain foamy the following day!
*Use card as paper won't be strong enough.
*Add all the decorations as soon as you have shaped the snowman (don't leave it to dry first!)


Other ways to use it:

  • Puffy Santa beard
  • Puffy Christmas Stocking
  • Add a tiny amount of paint to have coloured foam!

Thursday, 15 February 2018

'Complete the Picture' Art

This is a simple but effective art lesson that I have used for many themes. 
One year, I used photos I had taken with the children during a local trail and the children added in the details they remembered to complete the picture.

 I print out a picture or photo for the children and stick it on the page.
They use their imagination to complete their work of art. At the end I ask the children to chose a title for their art.  
 
Sometimes I use pastels or colouring pencils but just using pencils can also create a nice contrast.


Thursday, 5 October 2017

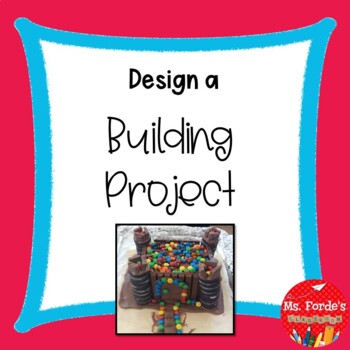
Building Project

Following on from the students' enthusiasm and engagement with the 'Bridges Project' last year, we did a 'Building Project' this year.

I did it in a similar way to the bridge project. First of all, we looked at different types of buildings all around the world and how they have changed over the years.

Then we looked at the types of materials that are used and why (for example why we use blocks in Ireland compared to mud huts in Africa).

We also looked at famous buildings around the world to give the children some inspiration and ideas.

The children then had to complete their project booklet and construct a building of their own!
                                         Make a Building project (STEM Project)

Take a look at a few of the finished projects.


The students presented them to the whole school after presenting them to the class.

Integration Ideas


Science: Materials (and how they can be used in construction)
Art: Construction
English: Oral Language, Procedural Writing
Geography: Homes Around the World
History: Change of Buildings over time (contrast photos of your locality: now versus long ago)
SPHE: Differences

Other Project Ideas:


Bridge Project

Monday, 2 October 2017

3D Hot Air Balloons

Last year, I did this art lesson with my class but this year when I decided to do it again I had forgotten how exactly I did it. So I am going to jot it down here for future reference!


Materials

  • Various Coloured paper-A4
  • Hot Air balloon template or blank page
  • Scissors
  • Pritt Stick
  • Rulers
  • Pencils

How to make them them

First off, I gave each child one coloured page. (Giving each child in a group a different colour will help to divide them out easily after)
Placing it portrait in front of them, they marked 1.5cm intervals across the page using their ruler and pencils.


Then they cut their coloured page along the intervals, leaving them with strips 1.5cm in width.
The children can  then share out the coloured paper so they have a mixture of coloured strips.

I gave my class a hot air balloon template but the children can also draw their own.
Fold about 2cm of the strip on each side. Put Pritt stick on the folded part. Place the part with Pritt stick on the edge of the hot air balloon and on the opposite side of the balloon.

Continue with the next strip until you have made you way around the balloon, placing one side north of the previous strip and one side South.
Decorate the hot air balloon with people, surrounding clouds etc.


Tips
Try to put strips right  beside each other to avoid gaps.
Ensure children fold the edges of the strips inwards rather than outwards.


Integration Ideas

English: Procedural Writing, Creative Writing
History: the first Hot Air Balloon
Science: how a hot air balloon flies
Geography: Transport


Thursday, 22 June 2017

Novel Ideas and Activities

This year, my class did 'Kensuke's Kingdom' as their novel. It was a real hit and here are some ideas that could be used for any class novel.

Design a book cover

Usually I get the children to do this after finishing the novel. It is a nice art activity to do. I download a book cover template on card for them and we discuss the elements of an effective book cover.


Letter to author

Rather than a book review, it can be nicer to use the medium of letter writing to show the author what you liked/disliked about the book. If you do decide to post them, you might be lucky and get a response!

Diary entry

Choose a specific part of the book and a character and ask the children to write a diary entry about what is happening. For Kensuke's Kingdom we used cold teabags to give them an old appearance.

Questions for main character

This can be a fun activity as we are usually the ones asking the questions rather than the children.
   

It can lead on nicely to the next idea:

Hot seat character

Choose a student to assume the role of a character. The other children then question them on various topics that arise in the novel.

News Report

In this, the children could create a news report for a main event in the novel. For example, in Kensuke's Kingdom we created a news report announcing that Michael was missing. The children can also record the news reports incorporating ICT.

Debate

We were doing persuasive writing this term so debating (either written or oral) is a great activity to do with novels. We choose specific points of the novel and debated the various pros and cons.

Chapter Activity Sheets

I designed some activity sheets that I used for some chapters. It includes the strategies of prediction, visualisation, summarising as well as vocabulary and character study.


Create a model/diorama of favourite scene

Another art idea where the children could select a scene from the novel and create a 3D representation or a clay model.

Design a comic strip of favourite scene

Again, a nice art activity. I choose a scene in the book and asked the children to illustrate what each character might be thinking or saying at that particular time.

Create a quiz

A fun way to assess their knowledge of the novel is to get the children to create a quiz. It is also a nice way to peer assess. Why not get the children to use ICT (maybe Powerpoint) to create an interactive quiz?


Alter the Ending

The children could write an alternative ending to the story or continue on the story to show what might happen next.

Letter to a character in the future

Imagine the book fasts forwards 10 or 20 years. Write a letter as if you are a character in the book writing to another character.

Create a wordsearch/crossword based on story

This is a nice way to summarise keys words and vocabulary from the novel. A wordsearch may be easier for younger classes or challenge them to create a crossword for their partner.

Character Profile

I gave the children a blank template to draw a character as they imagine them to look like. They also add some adjectives to describe the character and explain why they chose those specific ones.
 

Dramatise/mime a scene

Put the class in groups and assign a part of the novel to each group. They can dramatise it or mime the part while the rest of the class try to figure it out.

Create Movie Music

I asked my children to imagine the novel is being made into a movie. Using instruments or body percussion they create music for a particular scene.

Sense Response

Using a chapter in the book the children created a senses page and listed all the senses that the chapter appealed to. For example the waves crashing may appeal to the sense of hearing and sight.


I hope this gives you some ideas for studying novels. Feel free to comment with some other ideas below.


Here are a few that relate directly to Kensuke's Kingdom:

This was an art lesson inspired by Michael in the cave. The children used oil pastels and black paper for the cave.


 The children designed a map of the island based on what they imagined it to be like.


Missing Posters